Sunday, February 17, 2019

Add a header for UITableView

I'm developing a pet project, MyCalculator. I'm using a tableview to display the history of Math operations the user has entered. The image below shows how it looks like. (Note that I'm using Xcode 9 and Swift 3 to write this post.) 


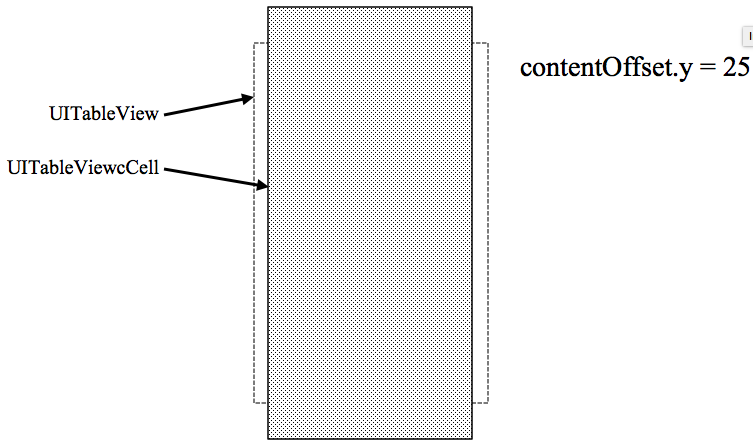
At first, I dragged a UILabel and dropped it on the UITableView above the UITableViewCell in the Interface Builder. When I run the app, the label is on top of all cells so it looked like a header. But, when I started scrolling down the tableview, the label moved up along with the cells and disappeared. This is not right. The header is supposed to be fixed on top. Then, I figured that the correct way of adding a header for the tableview is overriding the UITableViewDelegate's method:

tableView(_:UITableView, viewForHeaderInSection:Int) -> UIView?

In this post, I'm gonna create the header view using a XIB file. Some people might create it programmatically.

1. Overriding the UITableViewDelegate's tableView() method


Make sure the ViewController conform to UITableViewDelegate protocol and then override the method as following:

public func tableView(_ tableView: UITableView, viewForHeaderInSection section: Int) -> UIView? {
    return historyPopup?.dequeueReusableHeaderFooterView(withIdentifier: "HistoryTableViewHeader") as! HistoryTableViewHeader
}
 

HistoryTableViewHeader is a customer class I created in the step below. As the header view will be created using a xib file, we have to register it in the ViewController's viewDidLoad() method as following:

historyPopup?.register(UINib(nibName: "HistoryTableViewHeader", bundle: nil), forHeaderFooterViewReuseIdentifier: "HistoryTableViewHeader")
 

2. Creating HistoryTableViewHeader.swift File


import Foundation
import UIKit

public class HistoryTableViewHeader : UITableViewHeaderFooterView {
    
}
 

3. Creating HistoryTableViewHeader.xib File


a). Select File > New > File... then select View under the User Interface section and click Next. When a dialog shows up, name the file as HistoryTableViewHeader.xib and click Create.

b). find the file in the Project Navigator and open it. Then, drag a UIView from the Object Library and drop it on the view xib, and set appropriate constraints to make the UIView as a container or background view. After that, add a (History) UILabel to the container view and set any constraints needed.


c). make sure the Square icon is selected then open the Identity Inspector and set Class property under Custom Class section to HistoryTableViewHeader.

d). make sure the cube or File's Owner icon is selected then open the Identity Inspector and set Class property under Customer Class section to HistoryTableViewHeader.

e). Control-drag the History label to HistoryTableViewHeader class to create an outlet so that the label is accessible from the ViewController or other classes. When a popup appears, set Name to label and change Object from File's Owner to History Table View Header as shown in the image below (the option shows up in the listbox because of step c above).


Note that setting Object to File's Owner caused the run-time exception:
    
setValue:forUndefinedKey:]: this class is not key value coding-compliant for the key xib


Friday, February 15, 2019

How to detect if a UITableView has scrolled to the bottom

Concepts


A UIScrollView is a view whose origin (original coordinate) is adjustable over its content view. It clips the content view to its frame and changes its origin according to the finger movements. Then, the content view draws the part of itself based on the new origin.


UITableView is a subclass of UIScrollView so it's scrollable by default. To be able to detect if the scrollview has reached the bottom of its content, we have to understand three properties: contentOffset, frame, and contentSize.

contentOffset is the distance in points between the content view's origin and the scroll view's origin. A view's frame defines its location and size within its superview's coordinate system.


Codes


The ViewController must conform to UIScrollViewDelegate protocol, and set it as the tableView's delegate in viewDidLoad() method:

tableView.delegate = self
 

After that, add below method to the ViewController.
    
public func scrollViewWillEndDragging(_ scrollView: UIScrollView, withVelocity velocity: CGPoint, targetContentOffset: UnsafeMutablePointer) {
    if scrollView.frame.size.height >= scrollView.contentSize.height - scrollView.contentOffset.y {
       // add some codes here
    }
}
 

scrollView.frame.size.height does not change at all in this case. scrollView.contentSize is the size of all cells together in the table view.


References


Thursday, February 7, 2019

Create a Custom UITableViewCell in XIB File

I'm using Xcode 9 and Swift 3 to write this post. I'm going to create a custom UITableViewCell in a separate XIB file and then reuse it by a UITableView in the Main.storyboard file.

NIB files
Cocoa and Cocoa Touch objects are saved as .nib files. A nib file is a description of visual elements of an application's user interfaces such as windows, menus, and controls. The system (MacOS and iOS) uses the description at run-time to create the instances of the UI objects.

XIB files
The .storyboard and .xib files are used in Interface Builder to create the user interface's objects and see the result instantly. A .xib file can contain views or controls or even one controller. The .storyboard file contains the main interface of the application; it might include a .xib file and multiple view controllers. The .xib file is compiled by Xcode as a .nib file, which is loaded by the system at run-time. File's Owner is one of the most important objects of a nib file. The application code accesses the contents of the nib file through it.

1). Creating a Custom UITableViewCell with a XIB File


Go to File > New > File... then under iOS pane, select Cocoa Touch Class and click Next. When a dialog shows up, fill in the details as followings:


After clicking the Next button, two files will be created: HistoryTableViewCell.swift and HistoryTableViewCell.xib.

Click on the HistoryTableViewCell.xib file then add two labels (Operations and Result) then set the constraints properly. After that, click on the File Owner icon (cube icon) then open the Identity Inspector, set Class property to HistoryTableViewCell.


Create two outlets in HistoryTableViewCell.swift which reference Operations and Result labels in HistoryTableViewCell.xib.


2). Reuse the Custom UITableViewCell in Main.storyboard


Drag a UITableView control from the Object Library to Interface Builder and then drag a UITableViewCell control to the UITableView.

Select the Table View Cell then the open the Identity Inspector and set Class setting to HistoryTableViewCell.

3). Register the XIB file in the ViewController


Create an outlet for the UITableView (named historyTableView) in the ViewController.swift and add the following codes to the viewDidLoad() method of the ViewContoller.

historyTableView.register(UINib(nibName: "HistoryTableViewCell", bundle: nil), forCellReuseIdentifier: "historyTableViewCell")
historyTableView.dataSource = self
historyTableView.delegate = self
 

The register(nibName:, forCellReuseIdentifier:) method tells the table view how to create the cell in the nib object (XIB file).

The table view needs a datasource to query data for display. In this case, the ViewController is the datasource because I'll extend it to conforms to UITableViewDataSource.

4). Add Sample Data to the Table View


Add an extension to make ViewController adopt two protocols: UITableViewCellDataSource and UITableViewDelegate.
    
extension ViewController : UITableViewDataSource, UITableViewDelegate {
    
    public func tableView(_ tableView: UITableView, numberOfRowsInSection section: Int) -> Int {
        return 1
    }
    
    public func tableView(_ tableView: UITableView, cellForRowAt indexPath: IndexPath) -> UITableViewCell {
        let cell = historyTableView.dequeueReusableCell(withIdentifier: "historyTableViewCell") as! HistoryTableViewCell
        cell.operationsLabel.text = "1+2="
        cell.resultLabel.text = "3"
        return cell
    }
}
 

The two methods belong to UITableViewDataSource protocol, and they are required for displaying the data. In this case, the table view has only one row.

The dequeueReusableCell(withIdentifier) method creates an instance of HistoryTableViewCell if not exists in the queue and then reuse it for sub sequent requests.


References
https://developer.apple.com/library/archive/documentation/ToolsLanguages/Conceptual/Xcode_Overview/UsingInterfaceBuilder.html
https://developer.apple.com/library/archive/documentation/Cocoa/Conceptual/LoadingResources/CocoaNibs/CocoaNibs.html#//apple_ref/doc/uid/10000051i-CH4


Thursday, January 31, 2019

Swift 3's Core Data: Using A Separate Database File For Unit Tests

I'm developing a pet project and I have to populate data when launching the app in both Simulator and real devices. I also want to keep the data inputted while I'm manually testing the app on the Simulator. Then, it's a bit difficult for unit test. I can't let the unit tests modify or delete the pre-populated data and the inputted ones. I have to input the data differently for the unit tests and delete it back when the tests are finished. If I want to count the number of records of an entity in the store, I have to give the unit-test data negative identifiers to separate them from the pre-populated and the manually inputted ones within the app. I think it's better to have a separate database file for the unit tests alone.

In Xcode 9, when creating a Single View Application, the datastore is configured by default. The persistentContainer property (an instance of NSPersistentContainer class) is initialized in AppDelegate class. The persistentContainer encapsulates the Core Data stack in the app. It handles creation of the managed object, the persistent store coordinator, and the managed object context.

The persistentContainer object has a function called defaultDirectoryURL(), which defines the location of the datastore file. I'm going to subclass NSPersistentContainer and override this function to change the datastore's file location for unit tests.

1. Creating main.swift file


Before that, we have to comment out the @UIApplicationMain attribute on the AppDelegate class.


import Foundation
import UIKit

let isRunningTest = NSClassFromString("XCTestCase") != nil
let appDelegateClass = isRunningTest ? NSStringFromClass(UnitTestAppDelegate.self) : NSStringFromClass(AppDelegate.self)

UIApplicationMain(
    CommandLine.argc,
    UnsafeMutableRawPointer(CommandLine.unsafeArgv)
        .bindMemory(
            to: UnsafeMutablePointer.self,
            capacity: Int(CommandLine.argc)),
    nil,
    appDelegateClass
)
 

When launching the app, the system looks for @UIApplicationMain attribute on a class. Xcode adds the attribute on the AppDelegate class by default. The @UIApplicationMain acts as a main function, which initializes the UIApplication object (represents the current app instance) and its delegate (responds to important events in the app's life cycle) at run time.

According to Apple's documentation, if we don't use @UIApplicationMain, we must create a main.swift file at the top level that calls the NSApplicationMain(_:_:_:_) function. The third parameter is the name of UIApplication class or subclass. In the code snippets above, it's set to nil so UIApplication is assumed. The fourth parameter is the name of AppDelegate class or subclass. If the unit test is running (if the XCTestCase class exists in the bundle or not nil), UnitTestPersistentContainer (my custom class) is assigned. Otherwise, the default AppDelegate class is assigned.

2. Creating UnitTestAppDelegate class


import Foundation
import CoreData

class UnitTestAppDelegate : AppDelegate {
    
    override var persistentContainer: NSPersistentContainer {
        get {
            let container = UnitTestPersistentContainer(name: "MyCalculator")
            container.loadPersistentStores(completionHandler: { (storeDescription, error) in
                if let error = error as NSError? {

                    fatalError("Unresolved error \(error), \(error.userInfo)")
                }
            })
            return container
        }
        set {
            super.persistentContainer = newValue
        }
    }
}
 

3. Creating UnitTestPersistentContainer class

    
import Foundation
import CoreData

class UnitTestPersistentContainer : NSPersistentContainer {
    
    open class override func defaultDirectoryURL() -> URL {
        return URL(fileURLWithPath: NSHomeDirectory() + "/Documents")
    }
}
 

Note that the datastore file couldn't be created when I specified "~/Documents" or "/var/TMP" for the fileURLWithPath parameter. I don't know why.


References
https://developer.apple.com/documentation/coredata/nspersistentcontainer


Tuesday, January 29, 2019

Persisting an Array of Custom Objects with Core Data

This blog is about persisting an entity, which its attribute is an array of custom objects. Unlike the example I wrote here, the custom object does not has its own entity representation in the store. I'm using Xcode 9 and Swift 3.

1. Creating Entity


Open the Xcode model file, MyCalculator.xcdatamodeld in my case and create the entity as shown in the image below.


After that, select the model file again and choose Editor menu then Create NSManagedObject Subclass.... Xcode will then generate two files below.

HistoryMO-CoreDataClass.swift

import Foundation
import CoreData

public class HistoryMO: NSManagedObject {

}
 

HistoryMO-CoreDataProperties.swift

import Foundation
import CoreData

extension HistoryMO {

    @nonobjc public class func fetchRequest() -> NSFetchRequest {
        return NSFetchRequest(entityName: "HistoryMO")
    }

    @NSManaged public var operations: [AbstractExpressionMO]
    @NSManaged public var result: Double
}
 

2. Create the Custom Classes


Core Data converts an object into a type that it can store when saving and convert it back to the original object when restoring from the file system. A transformable attribute requires a NSValueTransformer subclass. The default transformer is NSKeyedUnarchiveFromDataTransfer class, which converts the object to and from NSData but the transformed object must conform to NSCoding protocol. If it does not conform to NSCoding protocol, we should write a custom NSValueTransformer subclass.

In my example, the custom classes I created conform to NSCoding protocol.


import Foundation
import CoreData

public class AbstractExpressionMO : NSObject, NSCoding {

    public override init() {
        super.init()
    }
    
    public required init?(coder aDecoder: NSCoder) {
        self.init()
    }
    
    public func encode(with aCoder: NSCoder) {
    }
}
 

The AbstractExpressionMO, as its name implies, is not intended for directly persisted. Since Swift does not support abstract class like in Java, I declared it as a class with empty methods. It extends from NSObject because Core Data requires the persisted object to be of type NSObject.

I added an initializer without parameter for the subclasses to call because Swift requires that all designated initializers of a subclass must call a designated initializer of its superclass.


public class NumberMO : AbstractExpressionMO {    
    fileprivate static var attrValue:String = "value"
    
    var value:Double?
    
    public init(_ value:Double?) {
        super.init()
        self.value = value
    }
    
    public convenience required init?(coder aDecoder: NSCoder) {
        let obj = aDecoder.decodeObject(forKey: NumberMO.attrValue)
        if obj != nil {
            self.init(obj as! Double)
        } else {
            // A void error when a column value is null
            self.init(nil)
        }
    }
    
    public func decode(coder aDecoder: NSCoder) {
        let obj = aDecoder.decodeObject(forKey: NumberMO.attrValue)
        if obj != nil {
            value = obj as! Double
        }
    }
    
    public override func encode(with aCoder: NSCoder) {
        aCoder.encode(value, forKey: NumberMO.attrValue)
    }
}
 

In NumberMO subclass, the convenience keyword was added for the initializer init(coder:) to force it to call one of the NumberMO's designated initializers. In my case, I want it to call init(_:Double?) initializer because I don't have to duplicate the codes to assign the value to a property.

I used NSCoder.decodeObject(forKey:) instead NSCoder.decodeDouble(forKey:) to avoid the app crash if the column value in the store is null.

    
public class OperatorMO : AbstractExpressionMO {
    fileprivate static var attrTag:String = "tag"
    
    var tag:Int?
    
    public init(_ tag:Int?) {
        super.init()
        self.tag = tag
    }

    public convenience required init?(coder aDecoder: NSCoder) {
        let tag = aDecoder.decodeObject(forKey: OperatorMO.attrTag)
        if tag != nil {
            self.init(tag as! Int)
        } else {
            // A void error when a column value is null
            return nil
        }
    }
    
    public override func encode(with aCoder: NSCoder) {
        aCoder.encode(tag, forKey: OperatorMO.attrTag)
    } 
}
 

Then, I just created the instances of NumberMO and OperatorMO classes and added them to the HistoryMO's operations properties and persisted them along with the HistoryMO object.

For how to write the object to the store, read this post.


Friday, January 25, 2019

Core Data with Swift's Generics

It requires a lot of codes to do CRUD (Create, Read, Update, and Delete) operations on an entity. If there are a lot of entities, we would end up writing hundreds of lines of duplicate codes. With Swift's Generics, we only write the CRUD methods once and are reused by with any entities.

GenericDao.swift
    
import Foundation
import CoreData

public class GenericDao {
    private var context: NSManagedObjectContext!
    
    public init(_ context: NSManagedObjectContext) {
        self.context = context
    }
    
    public func newManagedObject() throws -> T {
        var savedEntity:T!
        context.performAndWait {
            savedEntity = NSEntityDescription.insertNewObject(forEntityName: T.entity().name!, into: context!) as! T
        }
        return savedEntity
    }
    
    public func saveChanges() throws {
        var error: Error?
        if (context?.hasChanges)! {
            do {
                try context?.save()
            } catch let saveError {
                error = saveError
            }
        }
        if let e = error {
            throw e
        }
    }
    
    public func getAll(includePendingChanges:Bool = false) throws -> [T] {
        var result:[T] = []
        
        var error: Error?
        context?.performAndWait {
            let req:NSFetchRequest = T.fetchRequest() as! NSFetchRequest
            req.includesPendingChanges = includePendingChanges
            do {
                result = (try context?.fetch(req) as? [T])!
            } catch let saveError {
                error = saveError
            }
        }
        if let e = error {
            throw e
        }
        
        return result
    }
    
    public func get(orderBy attrName:String? = nil, ascending:Bool = true, offset:UInt? = 0, limit:UInt? = nil, includePendingChanges:Bool = false) throws -> [T] {
        var result:[T] = []
        
        var error:Error?
        context?.performAndWait {
            let req:NSFetchRequest = T.fetchRequest() as! NSFetchRequest
            req.includesPendingChanges = includePendingChanges
            req.fetchOffset = Int(offset!)
            
            if limit != nil {
                req.fetchLimit = Int(limit!)
            }
            
            let sortDescriptor = NSSortDescriptor(key: attrName, ascending: ascending)
            req.sortDescriptors = [sortDescriptor]
            
            do {
                result = (try context?.fetch(req) as? [T])!
            } catch let saveError {
                error = saveError
            }
        }
        if let e = error {
            throw e
        }
        return result
    }
    
    public func deleteAll() throws {
        var error:Error?
        context?.performAndWait {
            let req = NSBatchDeleteRequest(fetchRequest: T.fetchRequest())
            do {
                try context?.execute(req)
            } catch let saveError {
                error = saveError
            }
        }
        if let e = error {
            throw e
        }
    }
    
    public func delete(by attrName:String, _ attrValue:[Int]) throws {
        var error:Error?
        context?.performAndWait {
            let fetchReq = T.fetchRequest()
            fetchReq.predicate = getPredicate(attrName, attrValue)
            let req = NSBatchDeleteRequest(fetchRequest: fetchReq)
            
            do {
                try context?.execute(req)
            } catch let saveError {
                error = saveError
            }
        }
        if let e = error {
            throw e
        }
    }
    
    private func getPredicate(_ attrName:String, _ attrValue:[Int]) -> NSPredicate {
        return NSPredicate(format: "\(attrName) IN %@", attrValue)
    }
}
 

Wednesday, January 23, 2019

Browsing SQLite's data managed by Swift's Core Data framework

To see the location of the SQLite's database file, go to Product > Scheme > Edit Scheme... then select Run and add the following arguments.
    
-com.apple.CoreData.SQLDebug 1
-com.apple.CoreData.Logging.stderr 1


There is a free app to browse the database here https://sqlitebrowser.org/. I uploaded the app to my server here.

Or we can use the sqlite command which is built-in in OSX to enter SQLite's command shell by running this command:

sqlite3 ~/Library/Developer/CoreSimulator/Devices/8BDECFA8-1DD0-4EA8-8F3B-75B7EF61A351/data/Containers/Data/Application/8AF0221B-152B-4A61-B8AA-D3F9D0CBED6E/Library/Application Support/CoreDataTest.sqlite
 

SQLite's Commands


Query table's names

sqlite> .tables
ZEQUATION     ZOPERATORLOG  Z_METADATA    Z_MODELCACHE  Z_PRIMARYKEY
 

Show table's schema

sqlite> .schema zoperatorlog
CREATE TABLE ZOPERATORLOG ( Z_PK INTEGER PRIMARY KEY, Z_ENT INTEGER, Z_OPT INTEGER, ZOPERATORTAG INTEGER, ZOPERAND FLOAT );
 

Exit the command shell

> .exit
 

Select statement
The column's names must be specified.

sqlite> select z_pk, zoperatortag from zoperatorlog


References
https://wiki.genexus.com/commwiki/servlet/wiki31044,How+To%3A+Query+SQLite+database+from+an+iOS+Offline+App
https://stackoverflow.com/questions/24133022/sqlite-file-location-core-data/47402447#