Sunday, September 19, 2021

Backing up macOS with Time Machine

I installed macOS Big Sur on my MacBook Air (11-inch 2013) and used Time Machine application to backup the macOS partition to an external USB drive. 

I also created a bootable macOS Big Sur installation USB stick for restoring the changes back in time using Time Machine, or just installing a fresh macOS Big Sur. In fact, I can also boot into Recovery Mode to perform restore or install too (pressing Command + R while the machine is starting). If the hidden Recovery partition that macOS created is also corrupted or erased, the built-in internet Recovery Mode is used instead. The internet Recovery needs WiFi access to download recovery system image from Apple then start the Recovery mode.

Time Machine backs up the neccesary files to an external hard drive and then uses the backup drive to restore the files back in time. Time Machine can be thought of System Restore in Windows (it's not cloning). I formatted the backup drive using Mac OS Extended (journaled) file system but macOS Big Sur's Time Machine reformatted it as APFS (Case-sensitive). 

Backing up with Time Machine

1. Open System Preferences > Time Machine

2. Click on Select Disk... button and choose a drive or a partition to store the backup files. In my case, the partition's name is Time Machine's Backups (MBA-BigSur) as shown in the image below.

3. Click Options... button and make sure to add any drives or paritions other than the one running OS in the exlusion list

4. Uncheck Backup Automatically so it only backs up when neended.

5. Check Show Time Machine in menu bar then the clock icon will appear at the top of the screen

6. Click on the Time Machine icon in the menu bar and select Back Up Now


ERROR: " This copy of the Install OS X Mavericks application can't be verified. it may have been corrupted or tampered with during downloading"

The error messsage was thrown when running OS X Mavericks Installer (previously downloaded from App Store).

For my case, this is because the installer file was downloaded years ago so the certificate come with it had expired. I should re-download it but it was no longer available on App Store.

Thus, the workaround is to change my machine's date (clock) to the release year of OS X Mavericks. It's easy to change the date if the installer is launched from the running OS X prior to Mavericks, but if it is launched from Recovery mode, it invovles running commands in Terminal (there's enough posts on the net about this though).

Creating OS X Mavericks (or macOS) Bootable USB Drive

When downloading OS X Mavericks from App Store, the installer file's name might be something like  "Install OS X Mavericks.app" and stored in /Application folder.  Double click on the file would launch the installer then lead to restarting machine and installing the OS X Mavericks. 

But, OS X Mavericks was not available on App Store anymore so I downloaded it from someone else's backup on the net. He renamed the file "Install OS X Mavericks.app" to "Mavericks.app" and wrapped it in a DMG file.

I'm using MacBook Air running macOS Big Sur to make this bootable USB drive, just in case my machine fails to boot for some reasons.

Method 1

1. Prepare a USB stick with at least 6 GB then open DiskUtility to format it as Mac OS Extended (Journaled) and name it as InstallOSXMavericks.

2. Double click on the DMG file in Finder to mount it and copy the Mavericks.app to the /Applications folder.

3. Open Terminal and run the following command:

sudo /Applications/Mavericks.app/Contents/Resources/createinstallmedia --volume /Volumes/InstallOSXMavericks --applicationpath /Applications/Mavericks.app --nointeraction

NOTE: For macOS Sierra, the command might fail with the error message below:

/Volumes/NAK-InstallMacOSSierra is not a valid volume mount point.

If it does, run the following command:

sudo plutil -replace CFBundleShortVersionString -string "12.6.03" /Applications/Install\ macOS\ Sierra.app/Contents/Info.plist

4. Restart the machine. Before it starts, press and hold Option key until the boot menu shows up. Choose Install OS X Mavericks and wait to see if it's really bootable.

Method 2

1. Make sure DiskUtility has Full Disk Access permission. If not, assign it the permission, and here is how.

2. Prepare a USB stick with at least 6 GB then open DiskUtility to format it as Mac OS Extended (Journaled) and name it as InstallOSXMavericks.

3. Open Finder then double click on the installer file (DMG) to mount it

4. Navigate to the mounted image file then right click on Mavericks.app and select Show Package Contents. After that, open this folder Contents > SharedSupport and double click on InstallESD.dmg file to mount and show it in DiskUtility.

5. Select the USB drive from the side bar then click Restore and choose InstallESD.dmg from "Restore from" combobox and click Restore again.

6. When the restore completes, restart the machine. Before it starts, press and hold Option key until the boot menu shows up. It would not show Install OS X Mavericks like in Method 1 but EFI instead. Choose EFI then wait to see if it's really bootable. There can be another bootable device showing as EFI too. This is confusing and need to guess and try.  


NOTE: I used Method 1 to create a bootable USB for macOS Big Sur too and it worked.

Thursday, September 16, 2021

Creating a bootable Windows 10 installation USB drive

The easieset way to create a bootable installation media (USB drive) for Windows 10 (or any other Operating Systems) is using UNetbootin (a free open-source software). It can run on Mac OSes, Windows, and Linux.

I downloaded and installed UNetbootin on my MacBook Air (running macOS Big Sur) and used it to create a bootable Windows 10 installation USB drive successfully. It had two options for writing the Windows 10 setup file to the USB stick: automatically downloading Windows 10 and using local ISO file of Windows 10. I tried it with my MacBook Pro, and it did boot up from that USB. 

Step 1:

Open Terminal and run the following command to see the device identifier of the USB partition for storing Windows 10 installation file (which can be downloaded for free from Microsoft's website).

> diskutil list


For my case, I named the USB parition as REPAIRWIN10 and then the assigned identifier was disk2s6.

Step 2:

Start UNetbootin application and configure it as followings:


Unable to create a System Restore point on Windows 10 running on Macbook Pro 2011

After successfully installing Windows 10 on Macbook Pro 2011, I tried to create a System Restore point but got the failure message below.

The restore point could not be created. The shadow copy provider had an error (code 0x80042306).

Many people on the net recommended starting the Shadow Copy Provider in Services (press Windows + R then type services.msc) if it isn't running or restarting it if it is already running, but that didn't fix it.

Then, I checked the logs in Event Viewer and see the description of the error code 0x80042306 below. NOTE: To start Event Viewer, open Control Panel > System and Security then click on View event logs under Administrative Tools. After that, select Event Viewer (Local) > Windows Logs > Application (or System) and create a System Restore point so that the error shows up in the logs again.

Volume Shadow Copy Service error: Unexpected error CreateFileW(\\?\GLOBALROOT\Device\HarddiskVolumeShadowCopy38...

I googled it and some people said the AppleHFS driver (from Boot Camp) is the cause of the error, and they suggested disabling it. The driver allows read-only access to an HFS drive (HFS is a Mac OS file system format). Since I didn't need to access any HFS drives, I was fine with it. After disabling it, I was able to create System Restore.

Disabling AppleHFS driver:

1. Download and install Autoruns program (a part of Sysinternals Utilities to see the description of the error code).

2. Open File Explorer then navigate to C:\Windows\System32\drivers and rename the file AppleHFS.sys to AppleHFS_DISABLED.sys (or anything else).

3. Restart the machine.


Wednesday, September 15, 2021

Solved Issues while installing Windows 10 with VirtualBox (v6)

Message: "Something went wrong (OOBESETTINGS)"


This message showed up in the middle of installing Windows 10 with VirtualBox.

Solution 1

1. Close the window and choose Power off the machine.

2. Go to Settings and set number of CPU cores to 2.

3. Start the machine again.


Solution 2

1. Press Shift + F10 to open Command Prompt and then run the following commands:

> net user Administrator /active:yes
> net user /add MyName MyPassword
> net localgroup administrators MyName /add
> cd %windir%\system32\oobe
> msoobe.exe

2. Close the Command Prompt window then select Machine > Reset to restart the virtual machine. Don't use the close button at the edge of the window of the running machine to forcefully shut it off, it might corrupt the virtual hard disk, and the virtual machine can't start. If the similar error message shows up again or it's stuck at "Just a moment" screen, just restart it again.

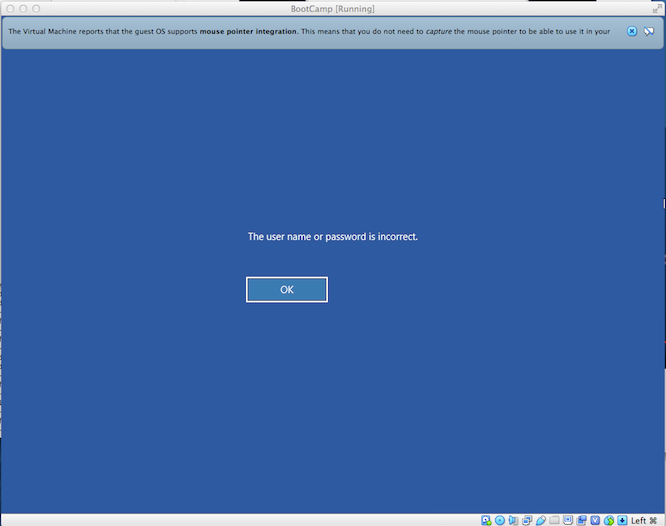
3. Click OK when the message below shows up.

then, it'll lead to Administrator login screen below. From this point forward, the error message should never appear again.


NOTE: After the installation's completed, disable the Administrator user because viruses can use the user to make change to the system files (even in Boot Sector).


Saturday, September 11, 2021

Useful programs and browser's extensions for my Macbook Pro 2011 running Windows 10

Programs


QTTabBar

It adds tabs to File Explorer.

Notepad++

It's a free source code editor supported several languages.

VLC

It's easy to add subtitle for a movie and can also increase the brightness and contrast of a video if it's too dark.

Free Download Manager

- Free
- Download any files faster 
- Integrate with browsers (using extension)
- Download torrents
- Download Youtube videos (in many formats or sizes)
iGetter is a good alternative; it's free, supports browser integration, and can download a whole site.


Chrome Extensions


Video DownloadHelper (Offered by: www.downloadhelper.net)

It can download movies (MP4 files) from any sites like kissasian.al.

Free Download Manager (Offered by: Free Download Manager.ORG)

It helps transfer any downloads, even from Video DownloadHelper extension, to Free Download Manager desktop program.


#1 FB Video Downloader HD+ (SnapSave) (Offered by: SnapSave Company)

It can download videos from Facebook, just clicking on the panel at the top right corner of a video without even playing. It also provides an option to download different video sizes.