Tuesday, December 18, 2018

How to auto resize a button's image according to the button's size in Swift 3

I'm developing a pet project called MyCalculator using Swift 3.


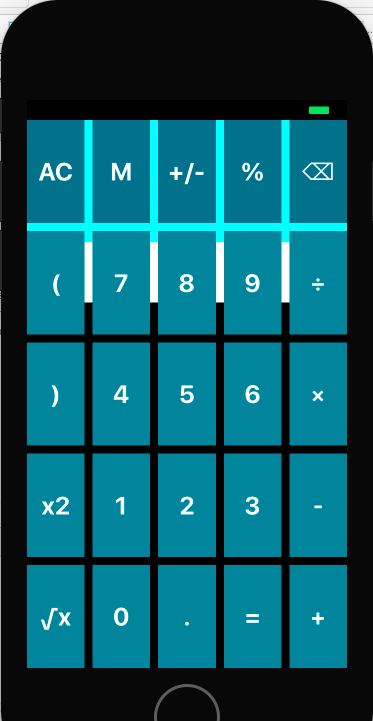
When the screen is rotated from portrait to landscape, more buttons appears then each button become smaller to fit the screen and does its image.


Without any additional codes, the image does not get smaller if its size is smaller than the button's in both portrait and landscape modes. This does not look good. What i want is, for example, the space between the image's top and the button's top should always equal 30% of the button's height and the image should get smaller or bigger according to the space.

I created a custom UIButton as following:

       
import Foundation
import UIKit

public class CustomButton : UIButton {
    private let offset = CGFloat(2.0) // 2 point

    public required init?(coder aDecoder: NSCoder) {
        super.init(coder: aDecoder)
        
        self.imageView?.contentMode = .scaleAspectFit
    }
    
    public override func layoutSubviews() {
        super.layoutSubviews()
        
        let edge = bounds.height / 3 - offset
        self.imageEdgeInsets = UIEdgeInsets(top: edge, left: 0, bottom: edge, right: 0)
    }   
}
       

The following line means the button's image scales to fit the available space by maintaining the aspect ratio. In other words, if the image's height changes, its width changes too proportional to the height.


self.imageView?.contentMode = .scaleAspectFit 
       

The imageEdgeInsets property is used to set the spaces around the image on the button. A button can have both image and title (text) at the same time. The titleEdgeInsets property is used to define the spaces around the title. There is another related property called contentEdgeInsets, which is used to set the spaces around both image and title together. I only specified the values of the top and the bottom because I need the top and bottom spaces to be equal.

The layoutSubviews() method is called when bounds or frame property changes, according to https://forums.developer.apple.com/message/317152?et=watches.email.thread#317152.


Unreliable Solution


It works for my case but it's not guaranteed since the bounds property is a computed property, not a stored property so it might have its own instance variable, which might be set internally without going through the bounds property then didSet and willSet would not be called.

import Foundation
import UIKit

public class CustomButton : UIButton {
    private let offset = CGFloat(2.0) // 2 point
    
    public override var bounds: CGRect {
        didSet {
            self.boundDidChange()
        }
    }

    public required init?(coder aDecoder: NSCoder) {
        super.init(coder: aDecoder)
        
        self.imageView?.contentMode = .scaleAspectFit
    }
    
    public func boundDidChange() {
        let edge = bounds.height / 3 - offset
        self.imageEdgeInsets = UIEdgeInsets(top: edge, left: 0, bottom: edge, right: 0)
    }
}


References
https://developer.apple.com/documentation/uikit/uiview/contentmode/scaleaspectfit
https://developer.apple.com/documentation/uikit/uibutton/1624034-imageedgeinsets

Friday, December 14, 2018

Displaying text and images together on UILabel in Swift 3

I'm developing a pet project called MyCalculator. I need to display the current operations the user is entering. I display the numbers and Math operators on a label. I inserted an image of  the square root of x operator in the label when the user touches the operator button.


The code snippet below show how to insert text and inline image in a UILabel.


    private var operatorImages: [Int:UIImage] = [
        103:UIImage(named: "squareRootX")!,
        116:UIImage(named: "cubeRootX")!,
        206:UIImage(named: "yRootX")!,
    ]
    private var operatorSymbolsCache : [Int:NSTextAttachment] = [:]
    
    private func getOperatorSymbol(_ tag: Int) -> NSTextAttachment {
        var result = operatorSymbolsCache[tag]
        if result == nil {
            result = NSTextAttachment()
            result?.image = operatorImages[tag]!
            result?.bounds = CGRect(x: 0.0, y: 0.0, width: Double(operatorImages[tag]!.size.width), height: Double(operatorImages[tag]!.size.height))
            operatorSymbolsCache[tag] = result
        }
        return result!
    }

    ...

    var myText = NSMutableAttributedString()
    myText.append(NSAttributedString(string: operand))
    myText.append(NSAttributedString(attachment: getOperatorSymbol(currentOperations[i].1.tag)))

    currentOperationsLabel.attributedText = myText


The problem is the operator image is not vertically center like in the image below.


I fixed it by updating the line:


result?.bounds = CGRect(x: 0.0, y: 0, width: Double(operatorImages[tag]!.size.width), height: Double(operatorImages[tag]!.size.height))


to:


result?.bounds = CGRect(x: 0.0, y: Double((displaySubSection.font.capHeight - operatorImages[tag]!.size.height) / 2), width: Double(operatorImages[tag]!.size.width), height: Double(operatorImages[tag]!.size.height))


I changed the y parameter. The graph below show what capHeight property is.


The properties capHeight, size.height, and size.width are in point. If the image dimension is 30x30 pixels, the size.height property would be 15 (points) and size.width property would be 15 (points) when the app is running on high resolution devices such as iPhone 5s and iPhone 6 because one point contains 2 pixels. To get the property's value in pixels, multiply it by the scale property of the UIImage class.


References
https://developer.apple.com/documentation/uikit/uiimage/1624105-size
https://stackoverflow.com/questions/26105803/center-nstextattachment-image-next-to-single-line-uilabel


Thursday, December 13, 2018

How to cut out an image in Photoshop

1. Open an image in Photoshop
2. Hold down the left mouse button on the Lasso Tool (L) icon from the Tools panel and select Polygonal Lasso Tool (L) from the popup.
3. Trace around the image you want to cut out. When you're done, the selection marquee shows up to around the image.


4. Press Ctrl + J (or command + J on Mac) to cut out the image to a new layer. Then, click on the Indicates Layer Visibility icon in front of Layer 0 to see the cut image on Layer 1.


5. Open the destination image. Both source and destination images might be opening as tabs so drag those tabs out to make them floated. After that, drag the Layer 1 from the source image to the destination image.


Reference
https://www.youtube.com/watch?v=on5MX_h8cdI
https://www.youtube.com/watch?v=n9fwiNyDHLI

Sunday, December 9, 2018

Regular Expression in Swift 3

To string in the example below matches the pattern:


let str = "5.14152834920+3.14120395872="
let pattern = "5.14[0-9]*\\+{1}3.14[0-9]*\\={1}"
Bool match = try match(source: str, pattern: pattern)
print("They matched \(match)") // True

func match(source: String, pattern: String) throws -> Bool {
        let regex = try NSRegularExpression(pattern: pattern, options: [])
        return regex.firstMatch(in: source, options: [], range: NSMakeRange(0, source.utf16.count)) != nil
}


Patterns


- [0-9]*  means zero or more digits
- \\+{1} means one plus sign. The double backslashes escape the plus sign.
- \\={1} means one equal character

Unicode


The firstMatch() method converts the given String object to NSString object but the String's count property does not always return the same value as the NSString's length property. The former relies on extended grapheme clusters, in which two or more unicode scalars combined are considered as one character.

  1. let regionalIndicatorForUS: Character = "\u{1F1FA}\u{1F1F8}"
  2. // regionalIndicatorForUS is 🇺🇸

The later relies on 16-bit code units, in which one unicode scalar is considered as one character. In the case above, there are two unicode scalars so it's two characters.

Then, to tell the firstMatch() method to iterate from start to end of the string, The utf16.count property must be used instead of the count property.


Reference
https://docs.swift.org/swift-book/LanguageGuide/StringsAndCharacters.html

Saturday, December 1, 2018

Swift's Unit Test: Comparing two floating-point numbers (in scientific notation)

Comparing two floating-point numbers in Unit test (using Swift 3's XCTAssertEqual() method) might fail if their precisions are different. For example, if the expected result is 3.3 but the actual result (of 10/3) is 3.333333333333333, the test fails. The solution is we specify the accuracy argument of the XCTAssertEqual() method to tell the framework that a small difference between their precisions do not matter.

let result = 3.3
XCTAssertEqual(result, 10/3, accuracy: 0.04)

In the code snippet above, the framework considers those two numbers are equal because they are just 0.033333333333333 different, which is less than the accuracy parameter 0.04.

Scientific Notation


In Swift, the double literal can be expressed in scientific notation like 1.234e10, which equals 12_340_000_000. The test in the example below will fail.

XCTAssertEqual(1.1234e10, 1.123e10)

To make the test successful, the accuracy parameter should be specified as following.

XCTAssertEqual(1.1234e10, 1.123e10, accuracy: 0.0004e10)
// 1.1234e10 = 11234_000_000
// 1.123e10  = 11230_000_000
// 0.0004e10 =     4_000_000

The accuracy value less than that such as 0.0003e10 or 0.0001e10 still make the test fail.


Friday, November 16, 2018

Introduction to Hyperbolic Functions (sinh, cosh, and tanh)

Terminology


A hyperbola (plural hyperbolas or hyperbolae) is an open curl lying on a plane. It has two pieces called branches or connected components. It's one of the three kinds of conic sections (such as parabola→1, the ellipse→2, and hyperbola→3), formed by the intersection of a plane and a double cone.

A cone is a three-dimensional geometric shape that tapers smoothly from a flat base to a point called apex or vertex.


A plane is a flat two-dimensional survey that extends infinitely far.


A conic section is a curve obtained from the intersection of the surface of a cone with a plane.

Some equations produce hyperbolas on the coordinate system as shown in the image below.


Hyperbolic Functions


The ordinary Trigonometric functions (sin, cos, and tan) are constructed using a unit circle but the hyperbolic functions (sinhcosh, and tanh) are constructed using unit hyperbola. The unit circle is a circle with a radius of one.


The unit hyperbolic is the set of points (x,y) in the Cartesian plane that satisfies the equation x2-y2=1. In other words,  x2-y2 always equals 1 if the point (x,y) is on the curve.


A hyperbolic angle (the triangle contained the red area), that has an area a, has a hyperbolic sector with an area half the hyperbolic angle (the red area). The hyperbolic angle a is a real number that is the argument of the hyperbolic functions (sinhcosh, and tanh). I don't know how to measure the area a, but the hyperbolic sector can be calculated (in radians) and then we just multiply it by 2 to get the area a. This video (I uploaded it to my server here) explains how to find the hyperbolic sector.


Below is the formula to calculate the hyperbolic functions. Unlike usual trigonometric functions, x is not an angle. It's the area.


Sunday, November 4, 2018

Enabling Khmer Unicode Keyboard on MacOS Sierra 10.12

You don't need to install anything on MacOS Sierra v10.12 or may be even on Mac OSX Mavericks v10.9. The Khmer Unicode keyboard layout and font (Kh Battambang) are built-in. It was created by Mr. Danh Hong (dnhhng@yahoo.com). To make it show up in the Menu bar, you have to open the Keyboard Preferences and add the keyboard named Khmer in the Input Sources as shown below.


Note that this keyboard layout does not work well with the Khmer fonts created by different developers. The issue can be missing or overlapping characters in Microsoft Offices. You have to use the fonts created by Mr. Danh Hong such as Kh Battambang (similar to Limon S1) and Kh Muol (similar to Limon R1).

Keyboard layout


Tuesday, October 30, 2018

Rotating a View in Swift

In Swift 3, a view or UIView object, has a property called transform, which is of type CGAffineTransform. This property is used to scale or rotate a view's frame rectangle in its superview's coordinate system. The CGAffineTransform struct represents an affine transform matrix used in drawing 2D graphics. Making changes to this property (or assigning a new value to it) triggers a redraw of its view.

Calling button.transform.rotated(by: CGFloat(Float.pi)) does not make any change to the button's transform property. Instead, it constructs a new copy of the property and rotates it. To rotate a button 180 degree, you can call the rotated() method on the existing transform property and assign the returned affine transformation matrix back to it as following:

button.transform = button.transform.rotated(by: CGFloat(Float.pi))

The rotated() method takes a floating-point number as a parameter which is a value of radian.

Radian


Radian is an International System unit used for measuring angles. The value of radian Ï€ or 3.14 is converted to an angle of 180 degree.


Affine Transformation


Affine transformation is used to transform an image by preserving points, straight lines, and planes. Examples of an affine transformation are translation, scaling, and rotation. It modifies its matrix to get a new coordinate of each point in an image for transformation.


Monday, October 29, 2018

Introduction to UIScrollView

The contents in your app might be cut off when they exceed the device's screen. Developers have to make them scrollable so the user can see all of the contents. For example, if you have a label (UILabel object) to display a hundred lines of article, you have to put it in a scroll view (UIScrollView object) so that the user can scroll up and down or left and right to see the whole article.

According to Apple's documentation, A scroll view (UIScrollView object) is a view whose origin is adjustable over the content view. It clips the contents to its frame and track the movement of fingers and adjust the origin accordingly. The origin refers to the original position on the screen.


Sample App


I'm developing a pet project called MyCalculator. The image below shows how I designed it in the Interface Builder (IB). I put the label named "Display Sub Section" to display the current operation the user's entering in a scroll view named "Display Sub Section Scroll View". The label for the current operation had a blue background but it did not show up in the image below because its size was zero by default at the design time without any constraints. Note that the scroll view had green background.


Then, I resized the label manually in IB.


But at runtime, the label didn't get wider even though its text was longer that its width, and so it couldn't be scrolled because the label's width is shorter than the scroll view's.


After that, I set constraints for the label's bottom, top, leading, and trailing equal to the scroll view's bottom, top, leading and trailing, respectively.


And it worked. I could scroll the label (blue background) left and right and the scroll indicator appeared but I had to enter the operation until it exceeded the screen's width first.


Note that the scroll view's contentSize.width property is greater than the scroll view's bounds.width property when the label's text exceeds the screen's width. Then, while you're scrolling, the scroll view adjust its origin to show part of the content accordingly.

Problem 1


I want to align the current operation the user's entering to the right as shown in the image below.


But, the content, the label, is left aligned by default when it's inside a scroll view. I cannot change it. It's the top-left corner of the scroll view's origin. When the current operation the user's entering exceeds the screen's width, the user will be able to scroll. I changed the Alignment setting of both the label and the scroll view but no effect. However, I found a workaround by rotating the scroll view as below.

displaySubSectionScrollView.transform = displaySubSectionScrollView.transform.rotated(by: CGFloat(Float.pi))
displaySubSection.transform = displaySubSection.transform.rotated(by: CGFloat(Float.pi))

This post explains in details about the rotated() method.


Introduction to UIStackView.Distribution.fillProportionally property

I've developed a pet project called MyCalculator, and the image below shows how its interface looked like.


I used stackviews to lay out the buttons and labels in rows. I used a root stackview, which contains two sub stackviews: one contains the labels to display the current operation and its result and another one contains all the digit and operator buttons.


First, I set the Distribution property of the root stackview to Fill Proportionally and defined a constraint to make the height of its first sub stackview proportionally smaller than its second sub stackview. Their height ratio is 2:6. I did it by Control+click the first stackview and drag to the second stackview then select Equal Heights from the popup menu. After that, I changed the Modifier in the constraint from 1 to 2:6.


Second, I set the Distribution property of the first stackview to Fill Proportionally because it contains two labels, one to display the entering operation and another one to display its result. The entering-operation label should be smaller than the result label. The system will display them based on their intrinsic content sizes (different font sizes, different intrinsic content sizes).

Third, I set the Distribution property of the second stackview to Fill Equally so that the digit and operator buttons have equal sizes. When using Fill Equally distribution, the system does not need to know the intrinsic content size of the stackview's contents. It can calculate the stackview's size based on the device screen's size.

Problem 1

The above solution worked well until I added a scroll view (UIScrollView) for the entering-operation label so that it's scrollable. But, the entering-operation label disappeared when I run the project.


 The reason that the label didn't show up is because the scroll view does not have intrinsic content size so the parent stackview can't calculate its height. I even switched the scroll view with a view (UIView object) and it still didn't work because the UIView object does not have intrinsic content size either. However, it worked when I replaced the scroll view with a stackview. It seems like the parent stackview can guess the inner stack view's size base on the size of its contents.


Then, I created a custom scroll view and override the intrinsicContentSize variable to return a value as following:

import Foundation
import UIKit

public class CustomScrollView : UIScrollView {
    
    @IBInspectable
    var height: CGFloat = 40.0
    
    public override var intrinsicContentSize : CGSize {
        return CGSize(width: 100, height: height)
    }
}

And it worked. However, the height of the entering-operation label is fixed to 40. I want it to dynamically scale according to the screen size so I added a constraint to define its height proportional to the result label's in the ratio of 2:4. Its height then scale dynamically according to the screen's size but the second sub stack view (we talked about above) stretched to the entire screen and overlapped it.


I don't know why. Logically, it should have worked because it did when there were only the two labels without the scroll view. I feel like the system didn't consider the first sub stackview when calculating the size of the second sub stackview.

What's interesting is the second sub stackview no longer overlapped the first sub stackview when I moved it up above the first sub stackview.


My assumption is the system calculated the size of the first sub stackview before the size of the second sub stackview as it found the first sub stack view from the array first. Then, the first sub stack view's size is included in the calculation of the second sub stackview's size.

But, why it worked when I used a stackview instead of a scroll view even if I didn't move the second sub stackview up, as I tested above? Perhaps, it was coded that way for the stackview in the UIKit. It tries to calculate the size of multiple hierarchical level stackview only when each container view is of type UIStackView.

Finally, I found a workaround. I created CustomStackView class by overriding the intrinsicContentSize variable to return any value similar to the CustomScrollView class above and then I modified the first sub stackview to be of type CustomStackView.


Monday, August 13, 2018

Synced MP3 File does not appear in iPhone

I'm using iPhone 6 and iOS 11.4. I used some online converter sites to convert a youtube URL to MP3 file and a local MP4 file to MP3/M4A file. Then, i added the converted file to iTune library to sync with my iPhone. After I've synced it, everything seemed fine cause the file appeared in the playlist i added it to on both iTune and the device. But, when i checked my iPhone, i couldn't see it in the Song section or the playlist i added it to.

At last, I could copy the file to my iPhone successfully by using a different converter site to convert the Youtube URL to MP3 file. The site is https://www.onlinevideoconverter.com/video-converter. I don't know why. I think the audio quality of the converted file is the culprit. The default audio quality that the site used is 192 kbps. For some other sites that didn't work showed 128 kbps for the output file.

Monday, July 30, 2018

Introduction to iOS Game Development

My First App


1). Open Xcode and select File > New > Project... then choose Game and click Next. I fill in the details and choose options for the next page as following.


Xcode will create a sample application, which set the background of the screen to black and display "Hello World" in the middle of it. Every time I tap on the screen, a small square appears for a few second and then disappears. Below is the project files created by Xcode.


This sample application is small but it's still hard to catch up for the beginner like me so I modified it just to show only the black screen.

2). Delete GameScene.sks and Actions.sks files

3). Modify GameViewController.swift file as following:

import UIKit
import SpriteKit

class GameViewController: UIViewController {

    var scene: GameScene!
    
    override var prefersStatusBarHidden: Bool {
        return true
    }
    
    override func viewDidLoad() {
        super.viewDidLoad()
        
        // 1. Configure the main view
                   let skView = view as! SKView
                   skView.showsFPS = true
        
        // 2. Create and configure our game scene
                   scene = GameScene(size: skView.bounds.size)
        scene.scaleMode = .aspectFill
        
        // 3. Show the scene
        skView.presentScene(scene)
    }

}

4). Modify GameScene.swift file as following:

import SpriteKit

class GameScene: SKScene {
    
    required init?(coder aDecoder: NSCoder) {
        super.init(coder: aDecoder)
    }
    
    override init(size: CGSize) {
        super.init(size: size)
        backgroundColor = SKColor(displayP3Red: 0.0, green: 0.0, blue: 0.0, alpha: 1.0)
    }

}


Concepts 


The difference between the sample game application above and the normal Single View application is the view of the view controller. For a Single View application, the view controller's view is of type UIView. But for a 2D game application, the view must be of type SKView, which presents SpriteKit content or scenes (represented by SKScene objects). 

SKScene class is a descendant of SKNode class so we can think of a scene as a node. SKNode does not draw anything, but it applies its properties to its descendants. A scene builds a block for its contents and acts as a root node for a tree of node objects. The root node applies its properties to its descendants and the contents of its descendants. For example, if a node is rotated, all its descendants are also rotated. 

You may switch between scenes using a single SKView object in your window. You can use SKTransition to animate between two scenes.

In the example below, the scene has 5 nodes such as Sky, Missiles, Body, Rotor1, and Rotor2. Sky is the root node.

The image below shows how those nodes are rendered using zPosition and position properties.


References
1). Book: Beginning Swift Games Development for iOS
2). https://developer.apple.com/documentation/spritekit


Tuesday, July 24, 2018

Building Your First iOS App

The purpose of this post is just to show you how to create a new application in Xcode and explain the project files automatically created by Xcode.

Open Xcode and create a new Single View Application. Then, open the Project Navigator and you'll see the project files created automatically as shown in the image below.


You can run the app on the simulator or an actual device by:
- Select Product > Destination and then select either a simulator or your device connected to the machine
- Select Product > Build
- Select Product > Run


About Project's Files


1). The AppDelegate.swift file defines AppDelegate class which will be executed by the system when you launch your app. This is done by @UIApplicationMain attribute at the top of the file. The attribute is just like calling @UIApplicationMain function and passing your AppDelegate's class name as the name of the delegate class. It might be simpler to explain it using the java code snippets below.

// declaring function
void uiApplicationMain(Class<?> delegateClass) {
   UIApplicationDelegate delegate = delegateClass.newInstance();
   UIApplication application = new UIApplication(delegate);
   
   // may present the delegate.window object
   // and call appropriate application() methods of the delegate
   application.launch(); 
}

// System calls the function
uiApplicationMain(AppDelegate.class);

The AppDelegate class contains the stub implementation of the delegate methods:
  1. func application(_ application: UIApplication, didFinishLaunchingWithOptions launchOptions: [UIApplicationLaunchOptionsKey: Any]?) -> Bool
  2. func applicationWillResignActive(_ application: UIApplication)
  3. func applicationDidEnterBackground(_ application: UIApplication)
  4. func applicationWillEnterForeground(_ application: UIApplication)
  5. func applicationDidBecomeActive(_ application: UIApplication)
  6. func applicationWillTerminate(_ application: UIApplication)

Those stub methods will be called by the application in response to the events. You can add your own codes there to do any actions responded to the events or leave them empty for default behaviors.

2). Assets.xcassets file lets you define the app icons, images used within the app, and other resources. See this post for how to define the app icons.

3). Main.storyboard file is managed by Xcode to make it simple for developers to design the interface of their apps. They just drag and drop the controls needed. Then, Xcode will create necessary Swift or Objective-C classes, configuration and resource files behind the scene. The storyboard represents the screen of content in your app.

4). ViewController.swift file contains the ViewController class corresponding to the view controller you designed in the Main.storyboard file (or Interface  Builder). They're linked together by Class setting under Custom Class section in the Property Inspector. The image below shows how their link is defined.


The ViewController class let you programmatically manage or customize the behavior of your view controller. You can add more view controllers in the Interface Builder and define their corresponding view controller classes in Swift files separately. Each view controller has its own view while the view might have many sub views such as textboxes, buttons, and labels.

5) Info.plist (Information property list file) is the way an app provides its metadata to the system. It is mandatory for the bundled executables (apps, plug-ins, and frameworks). It's encoded using UTF-8 and is structured as XML. See here for more details.


Reference
https://developer.apple.com/library/archive/referencelibrary/GettingStarted/DevelopiOSAppsSwift/BuildABasicUI.html#//apple_ref/doc/uid/TP40015214-CH5-SW1